
Creating an invoice to the PA under the Regime Forfettario
Creating an invoice to the PA under the regime forfettario is very simple with Partitaiva24 Cloud.
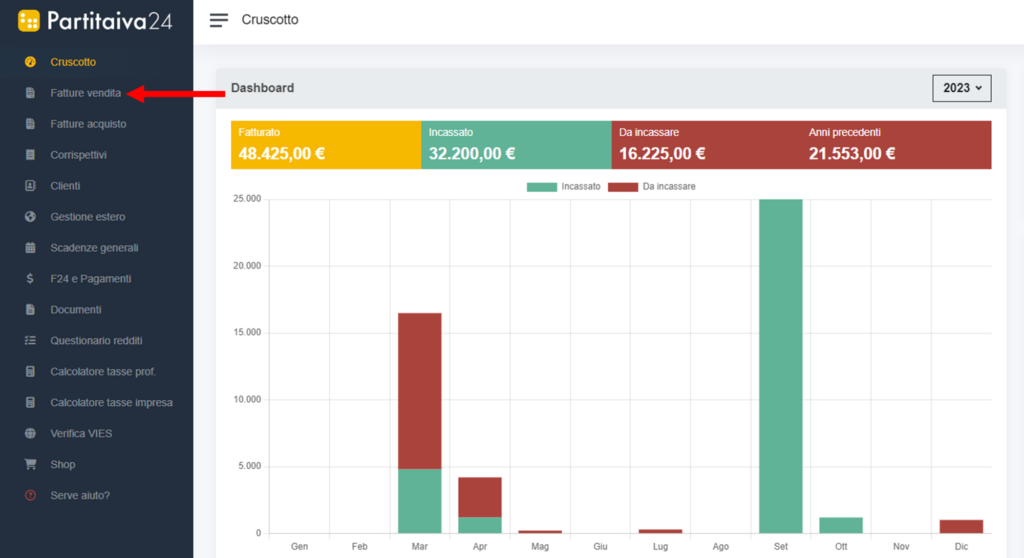
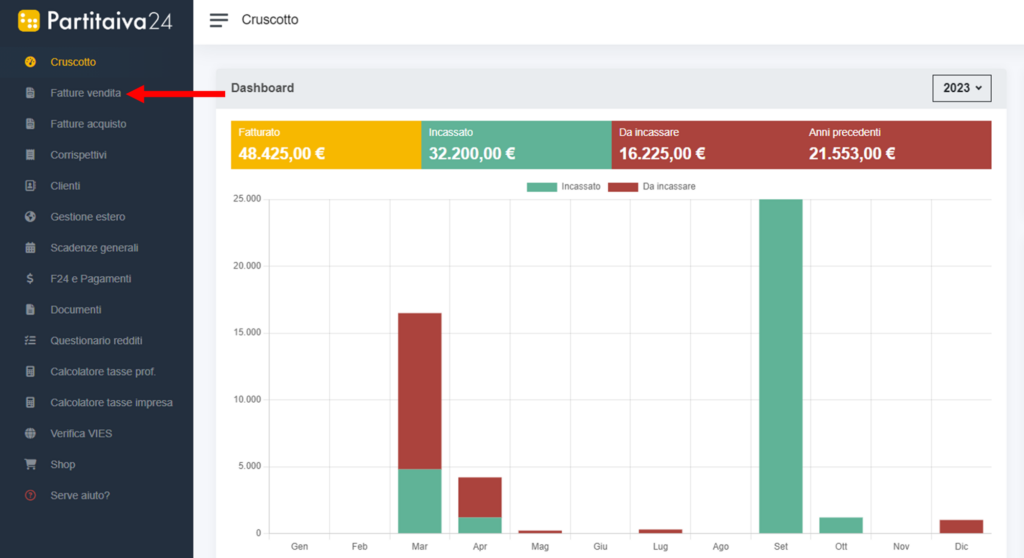
If you have already logged in to the area for the first time and set up your invoicing information to issue your invoice, you will need to click on fatture vendita from the menu on the left.
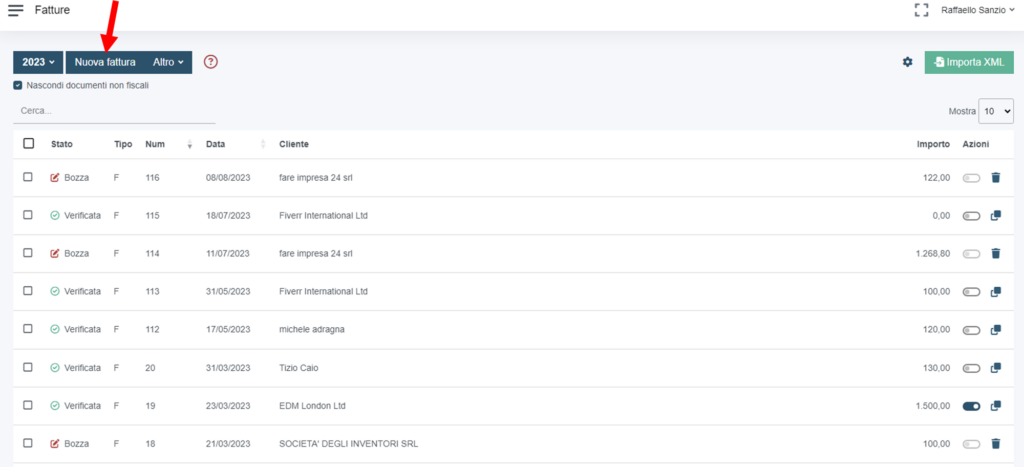
Then click on “Nuova fattura” to start compiling.
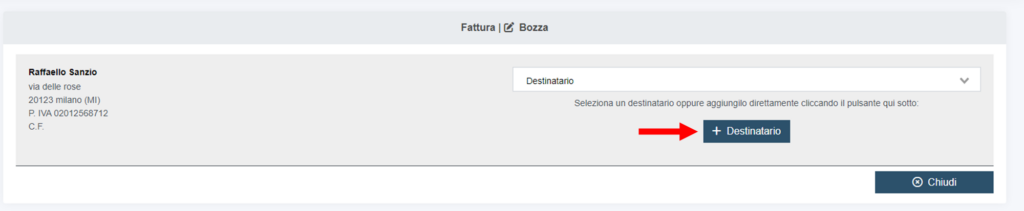
If you have a new customer click on the button “+destinatario” to create the new master data. If, on the other hand, you have previously issued invoices to the same administration, enter the initials in the “destinatario” box to search for it.
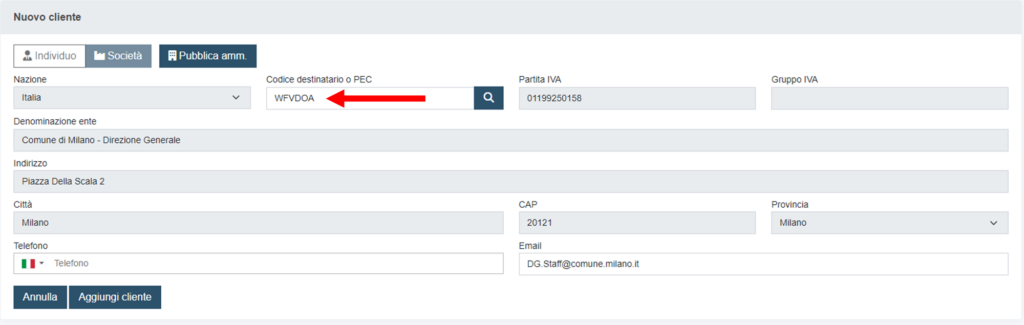
Select “pubblica amministrazione”. To load the PA master data, simply enter the “codice PA/codice ufficio/codice univoco” you have been given in the appropriate section and the master data will be filled in automatically.
Having entered the customer, we move on to the next section: numero e data della fattura
The software automatically sets the date and number of the invoice, but you can change both. Remember that you may backdate the invoice a maximum of 12 days from the time of issue in order not to incur penalties.

Let us now move on to the body of the invoice. You must enter the description of the service or product sold, the unit of measurement, the quantity and the amount (per unit) in the appropriate fields. Also in this line you will be able to apply any discount.
Lastly, the very important tax rate section. By default, given your tax regime, the regime forfettario is selected. However, it is important to always check the rate because it may be different depending on the type of operation you are carrying out. To change it, simply click on the drop-down menu and choose the correct rate.

If you wish to enter a new service/product, you will have to add a new line by clicking on the “+” button and then fill in the various fields, as before.

NB. Only if you are a professional and are registered with a professional association, remember to also click on the button bearing the name of your association to enter the supplementary contribution. If the invoice exceeds €77.47, it will be subject to a virtual tax stamp and the software will apply it automatically. You will not have to do anything at this stage.
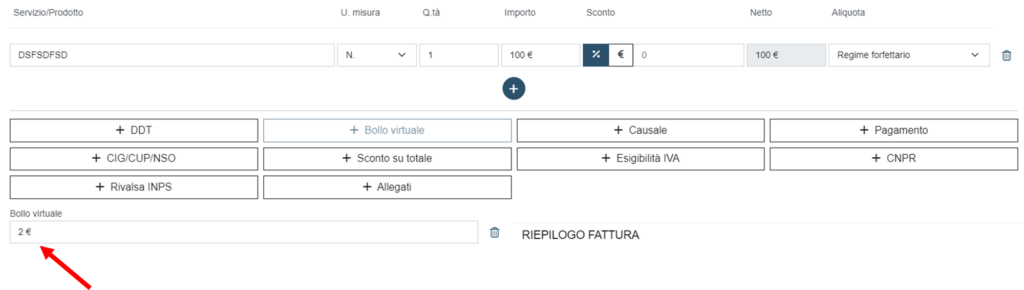
Stamps will be paid periodically through the channels provided by the revenue agency. Click the next link to learn more: how to pay virtual revenue stamps.
You will now have to enter the additional data typically required by PAs: CIG/CUP code, details of the contract signed, etc... These data must be entered in specific sections of the e-invoice. To do this, click on “+CIG/CUP/NSO” and fill in the mask with the information received from the administration.
In the document section, choose the type between: “ordine d’acquisto“, “convenzione“, “contratto“, “ricezione“, “fattura collegata“ , in the identification section enter the details of the document, then enter the date, any job code and any CIG and CUP codes if the PA has provided them to you.
Carefully re-check the information received from the PA.

At this point the invoice is almost complete. You only have to choose how you will be paid.
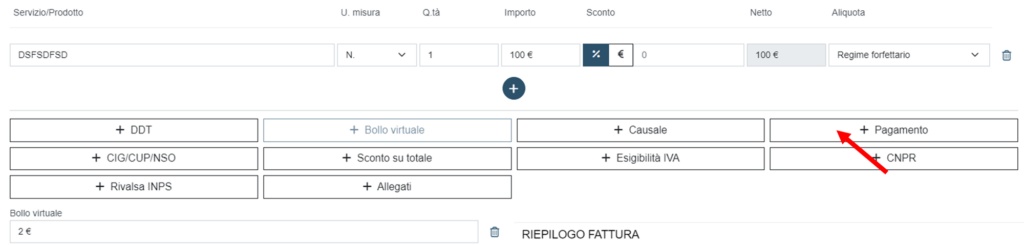
Click on “+Pagamento” and choose the payment method you have agreed with your customer.
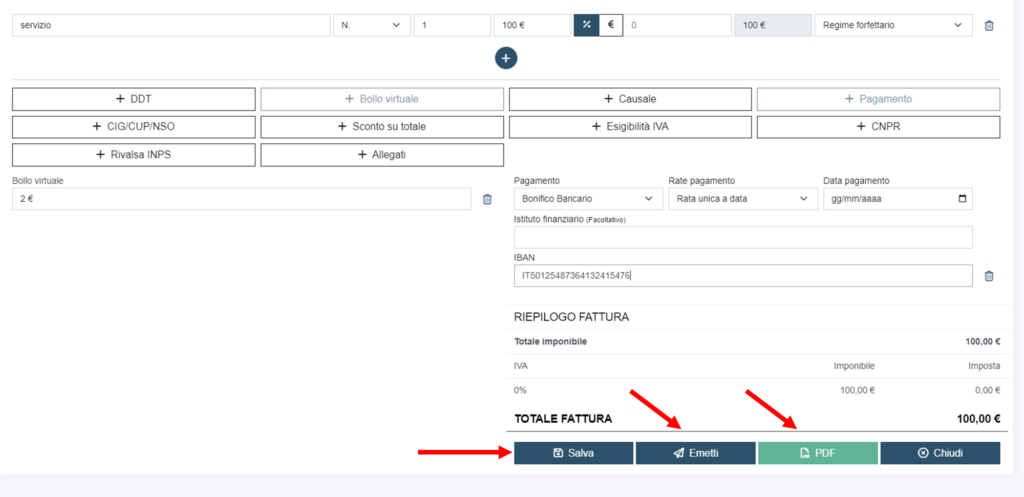
Your invoice is now complete. You must first save it by clicking on the appropriate button and then, if you wish to issue it immediately and send it to the SDI, simply click on the “emetti” button.
In the menu on the left you will find the entire list of issued or simply saved invoices. To edit and/or send drafts, simply click on the pencil at the chosen draft.

To check all the data, you can preview the invoice by clicking on the PDF. The same PDF, you can hand over to your customer as a courtesy copy while waiting to receive the xml file from the revenue agency.
If all data are correct and you wish to send the invoice, you can click on issue and then confirm sending to the SDI.
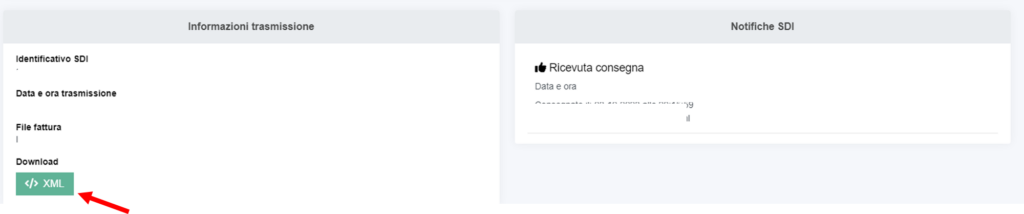
At the top you will find the status of the invoice as sent and after a few hours, if the invoice is accepted by the SDI, the status will change to 'accepted'. For accepted invoices, you will also have the receipt of successful delivery to the SDI by clicking on the selected invoice and then on the "XML" button at the bottom of the page.
NB. If you issue an invoice to the PA, don't forget to check the receipt a few days after it has been issued. Although formally the invoice may be correct and accepted by the SDI, the PA may reject the invoice for lack of information or incorrect data entry. You may therefore find yourself with an invoice accepted by the SDI but rejected by your client's PA office. In such cases, you will therefore have to issue a credit note and a new invoice with the correct information.

Don't forget to mark your invoice as collected when you receive payment. This way you will feed your dashboard and keep your business under control.

Lastly, our consultants will also check the substantive correctness of the invoice and verify it, further amending its status.